Have you ever felt frustrated with how difficult it is to do a code review for Jupyter Notebooks? At DrivenData, we developed an open-source tool called nbautoexport to make this experience better. In this article, we will show you how we include script copies of notebooks in version control, which are generated automatically with nbautoexport.
Jupyter Notebooks and Code Reviews
Jupyter Notebooks are a ubiquitous part of data scientists' toolkit, especially for those working in the Python ecosystem, and for good reason. As a computational notebook framework, Jupyter facilitates "literate computing" and reproducible analyses. The code used to produce a result is inlined alongside it, making it easy to inspect and understand how the result was produced.
At DrivenData, Jupyter Notebooks are our go-to medium for conducting and documenting exploratory data analyses. In our standard project structure (Cookiecutter Data Science), we keep our notebooks organized together within a notebooks/ subdirectory.
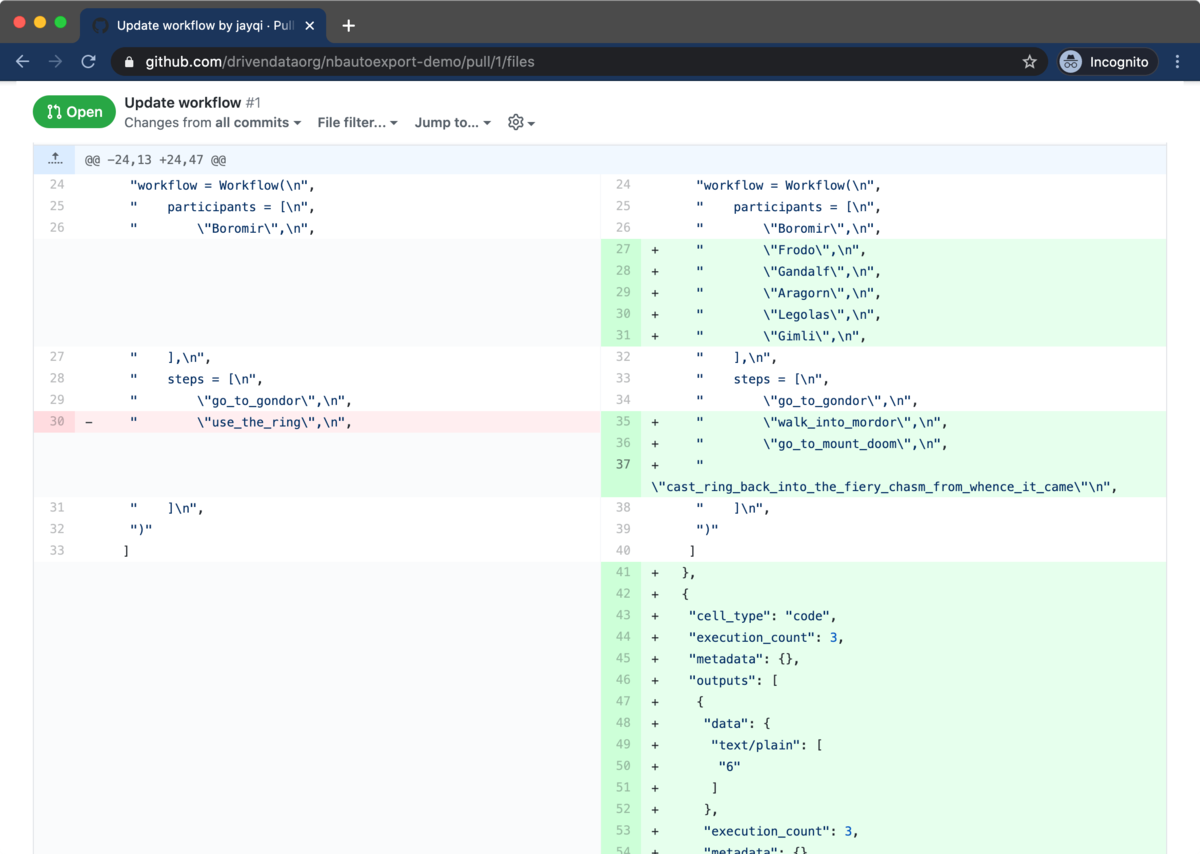
Unfortunately, Jupyter Notebooks are challenging to do code reviews for. The raw content of notebooks are a gnarly mix of source code, markdown, and HTML embedded in a JSON document. While GitHub provides nicely rendered file views for notebooks, the pull request interface instead shows the underlying raw JSON. This raw JSON is hard to read and navigate, and it's not conducive for diffs.
Code Diffs
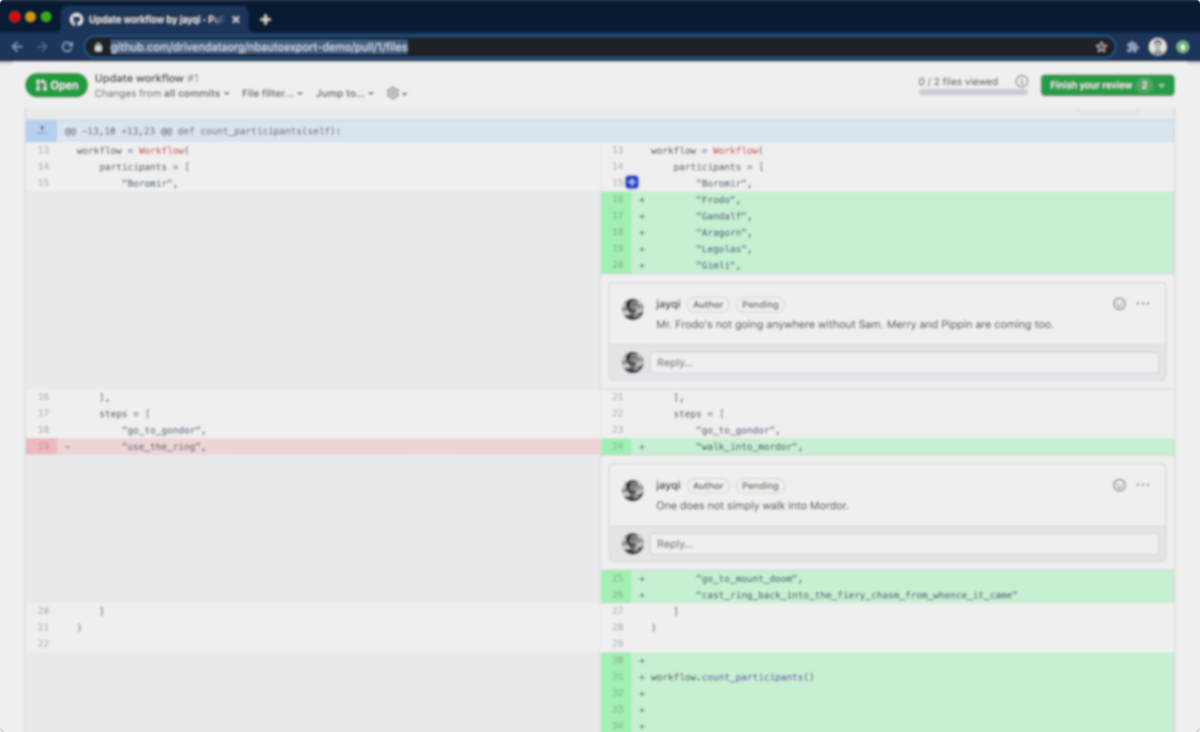
In typical code reviews, reviewers spend their time looking at the differences between source code before and after a change, commonly referred to as diffs. Version control repository hosts like GitHub and Bitbucket have focused pull request review workflows, making it easy for reviewers to examine and comment on diffs. Even little things like syntax highlighting make the experience much more pleasant.
Because source code is so well-supported, we make use of this workflow for our Jupyter Notebook code reviews. In addition to the Jupyter Notebooks, we also include script versions when we commit to version control. It's a clean way for reviewers to see the code and to leave comments inline.
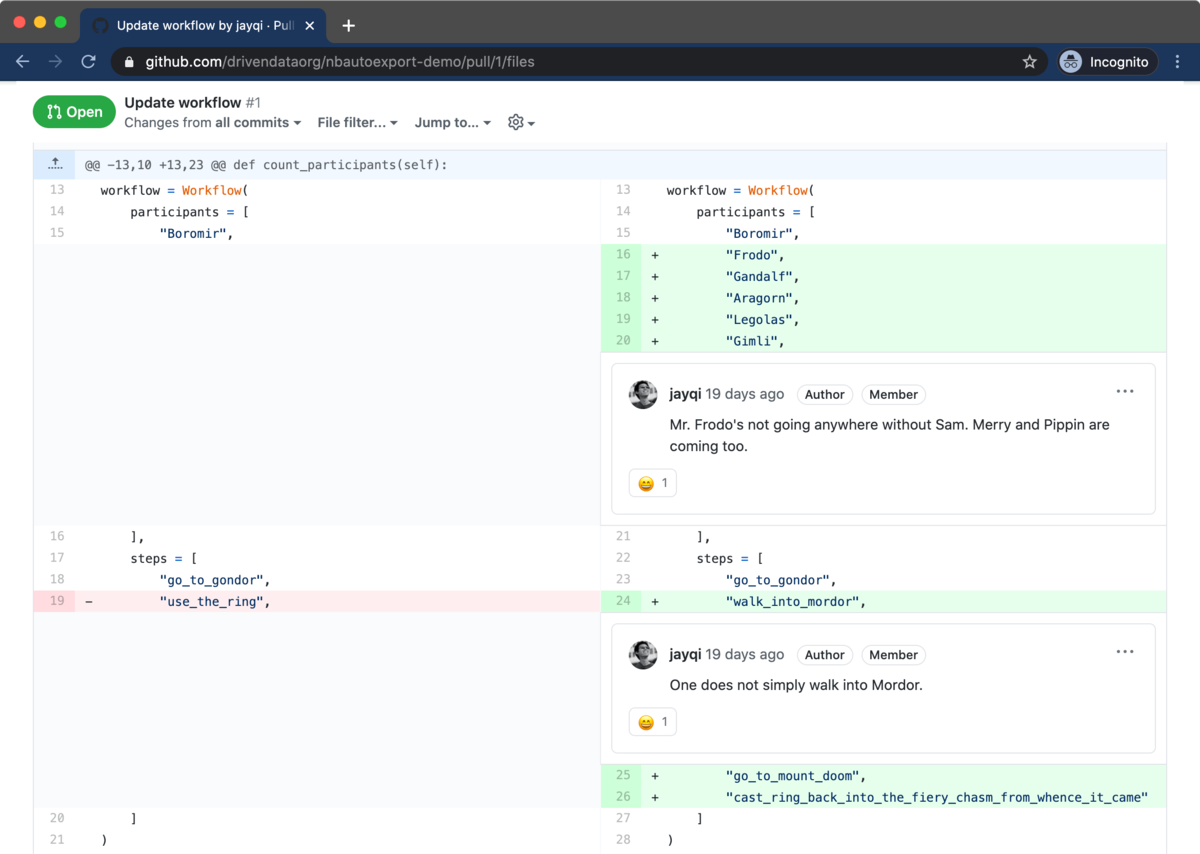
How can we most easily get this source code out of the notebook files? The utility nbconvert from Jupyter is a handy way of exporting notebooks into other formats, including a Python script source code format. Adding these .py script files to a repository is very helpful for code reviews, but it's tough having to remember to run nbconvert all the time. In order to make this experience seamless, we at DrivenData developed nbautoexport on top of nbconvert to handle this all automatically for our projects.
Automating script exports with nbautoexport
nbautoexport is a tool for automatically running notebook exports when you save notebooks while using Jupyter. In this section, we'll walk through the basic setup and use.
You can get nbautoexport like typical Python packages with pip from PyPI or with conda from conda-forge. You should install it in the same virtual environment that you are running Jupyter Notebook or JupyterLab from.
# with pip
pip install nbautoexport

# with conda
conda install nbautoexport -c conda-forge
Once installed, you'll primarily use the nbautoexport command-line interface to configure things. There are two main steps to setting up nbautoexport:
- Install nbautoexport as a post-save hook with Jupyter (once per machine you use it on)
- Configure a notebooks directory (once per project you are working on)
Install the post-save hook
nbautoexport uses the post-save hook functionality in Jupyter. With the hook installed, nbautoexport will run after every time you save in the Jupyter application. To install the post-save hook, run:
nbautoexport install
This is something you only need to do once, as your Jupyter configuration file is typically located in your home directly and shared across virtual environments. Note that if you already have a Jupyter server running, you will need to restart it for the installation to take effect.
Configure a directory
The other required setup step is to configure a directory. When the nbautoexport post-save hook runs, it will check for a .nbautoexport configuration file in the same directory as the notebook. The hook will only run the export process if a valid configuration file is present.
You can generate the file using the configure command with the path to your notebooks directory:
nbautoexport configure notebooks/
This will generate the default configuration. This file is what indicates to nbautoexport to execute on saving notebooks in a directory.
cat notebooks/.nbautoexport
#> {
#>   "export_formats": [
#>     "script"
#>   ],
#>   "organize_by": "extension",
#>   "clean": {
#>     "exclude": []
#>   }
#> }
Trying it out
That's it for setup. We can now try out. Spin up an instance of Jupyter Notebook or JupyterLab. Make some changes to a notebook, and save it. (You can use the keyboard shortcut Cmd+S or Ctrl+S.)
You'll see a directory called script/ pop up, which in our example contains a new file workflow.py corresponding to our notebook workflow.ipynb.
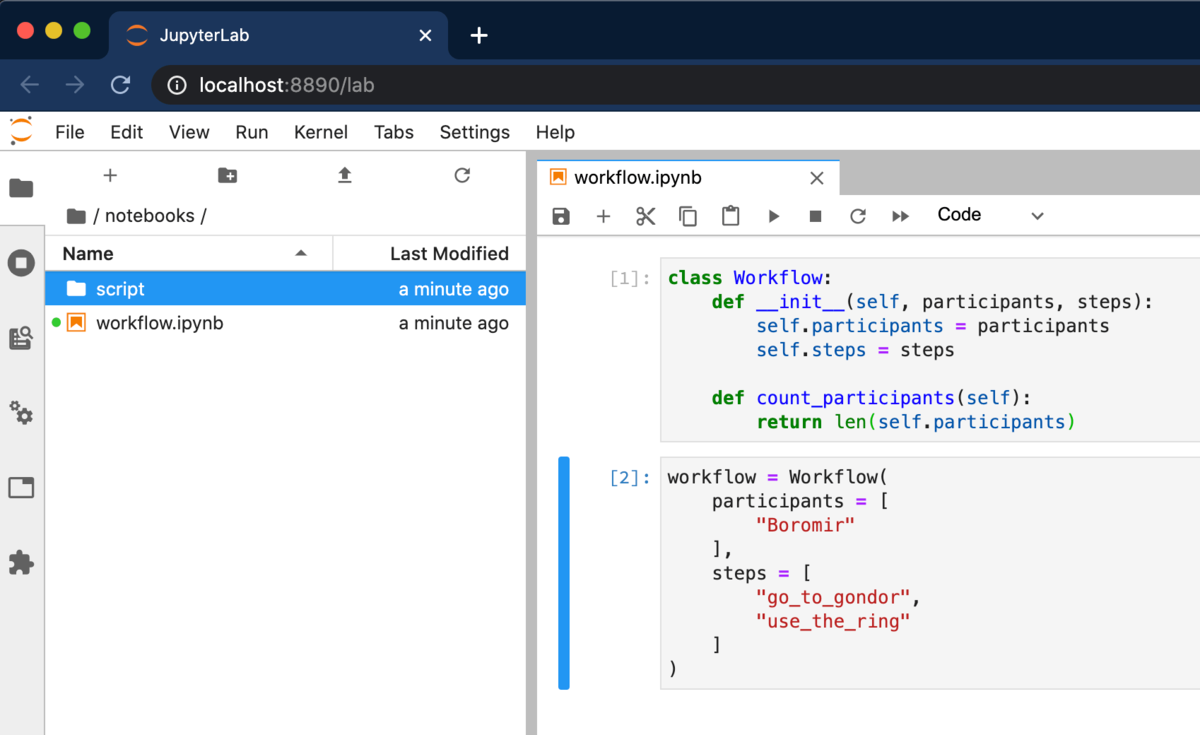
script/ subdirectory automatically.tree notebooks/
#> notebooks/
#> ├── script
#> │ └── workflow.py
#> └── workflow.ipynb
In the future, any time you save a notebook in this directory, nbautoexport will regenerate the exported files in script/. You can commit the exported scripts, and now you can use them for code reviews. We get the desired difference view that we showed earlier in the article, without having to manually generate the files.
If you want to see the rendered notebook, you can use the "View file" menu option as a shortcut to quickly get to it. We often find it helpful to have them open to the side while reviewing the code diffs.

You can check out the demo repo shown in the screenshots here, and you can see the pull request directly here.
There's More
nbautoexport has additional advanced features. You can configure the export to give you multiple formats. We've found it useful to additionally generate an HTML version. You can use it in a pinch when GitHub's notebook renderer fails, or you can quickly grab it to email to someone. nbautoexport also has a clean command to clean up old export files if you change the names of your notebooks.
To learn more about these features and others, you can use the --help flag after any CLI command, or you can check out the documentation website.
We developed this tool because we felt the pain of Jupyter code diffs. We open-sourced it because we think this is a problem a lot of data scientists experience. We hope you find this as useful as we do. Enjoy your notebook code reviews!


