How to build a multimodal deep learning model to detect hateful memes

Take an image, add some text: you've got a meme. Internet memes are often harmless and sometimes hilarious. However, by using certain types of images, text, or combinations of each of these data modalities, the seemingly non-hateful meme becomes a multimodal type of hate speech, a hateful meme.
In our brand new competition, we've partnered with Facebook AI to ask you to develop a multimodal model for detecting hateful memes. This is a hard problem, because relying on just text or just images might lead to lots of false positives. That's why the team at Facebook AI has developed a brand new dataset designed to encourage well-developed mutimodal modeling solutions.
In this post we're going to show you how to implememnt a first-pass multimodal deep learning model for detecting hateful memes, as well as how to prepare a submission for our new competition. We're going to be building our model step by step, but keep your eye on Facebook AI's MMF, a modular multimodal framework for supercharging vision and language research, which will be developing tooling to work with this very dataset and lots of cool others!
To get started, we import some standard data science libraries for loading and manipulating data.
%matplotlib inline

import json
import logging
from pathlib import Path
import random
import tarfile
import tempfile
import warnings

import matplotlib.pyplot as plt
import numpy as np
import pandas as pd
import pandas_path  # Path style access for pandas
from tqdm import tqdm
Additionally, we'll be using some of the utilities from our deep learning libraries to explore the data before we make our model, so it's worth introducing them now. Facebook AI's open source deep learning framework PyTorch and a few other libraries from the PyTorch ecosystem will make building a flexible multimodal model easier than it's ever been.
Since the hateful memes problem is multimodal, that is it consists of vision and language data modes, it will be useful to have access to differnet vision and language models.
Vision models and utilities. torchvision by PyTorch consists of popular datasets, model architectures (including pretrained weights), and common image transformations. It's indispensable if you're working on computer vision problems with PyTorch.
Language models and utilities. fasttext by Facebook AI makes it easy to train embeddings for your data. It's a good first pass before diving into more sophistocated approaches such as transformers.
We will use a torchvision vision model to extract features from meme images and a fasttext model to extract features from extracted text belonging to images. These language and vision features will be fused together using torch to form a multimodal hateful memes classifer. Let's go ahead and import them now.
import torch
import torchvision
import fasttext
Now, on to the data.
Loading the data
On the data download page, we provide everything you need to get started. Once you've downloaded and extracted the data, in addition to the license.txt and README.md you should see
img.tar.gzis the directory of all the memes we'll be working with for training, validation, and testing. Once extracted, images live in theimgdirectory and have unique identifierids as filenames,<id>.pngtrain.jsonlis a.jsonlfile, which is a list of json records, to be used for training. Each record had key-value pairs for an imageid, filenameimg, extractedtextfrom the image, and of course the image binarylabel.0is non-hateful and1is hateful.dev.jsonlprovides the same keys, for the validation split.test.jsonlagain has the same keys, with the exception of thelabelkey.
In this competition, we're using the same splits as Facebook AI's recent publication describing the release of the dataset, which is why we've included a validation split explicitly.
We'll make Paths to all this data now for convenience.
data_dir = Path.cwd().parent / "data" / "final" / "public"

img_tar_path = data_dir / "img.tar.gz"
train_path = data_dir / "train.jsonl"
dev_path = data_dir / "dev.jsonl"
test_path = data_dir / "test.jsonl"
First let's extract the images if we haven't already.
if not (data_dir / "img").exists():
    with tarfile.open(img_tar_path) as tf:
        tf.extractall(data_dir)
We could use the native json libray to load the records directly into a list, e.g., [json.loads(line) for line in open(‘train_path’).read().splitlines()]. Or we could use the Pandas read_json method, with the lines=True parameter to indicate that that this is .jsonl data.
train_samples_frame = pd.read_json(train_path, lines=True)
train_samples_frame.head()
Let's see if the classes are balanced
train_samples_frame.label.value_counts()
It looks like we may want to apply some class-balancing during training!
Exploring the text data
It's always useful to gain a sense of how many words the text samples tend to have. The simplest way to get statistics on the text may be to split text on spaces, " ", compute the length of the resulting list, and call the Pandas describe() method on the Series.
train_samples_frame.text.map(lambda text: len(text.split(" "))).describe()
from PIL import Image


images = [
    Image.open(data_dir / train_samples_frame.loc[i, "img"]).convert("RGB")
    for i in range(5)
]

for image in images:
    print(image.size)
It looks like we'll need to resize the images to form tensor minibatches appropriate for training a model. This is where we turn to the torchvision.transforms module. We can use its Compose object to perform a series of transformations. For example, here we'll Resize the images (this function interpolates when needed so may distort images) then convert them to PyTorch tensors using ToTensor. Once the images are a uniform same size, we can make a single tensor object out of them with torch.stack and use the torchvision.utils.make_grid function to easily visualize them in Matplotlib.
# define a callable image_transform with Compose
image_transform = torchvision.transforms.Compose(
    [torchvision.transforms.Resize(size=(224, 224)), torchvision.transforms.ToTensor()]
)

# convert the images and prepare for visualization.
tensor_img = torch.stack([image_transform(image) for image in images])
grid = torchvision.utils.make_grid(tensor_img)

# plot
plt.rcParams["figure.figsize"] = (20, 5)
plt.axis("off")
_ = plt.imshow(grid.permute(1, 2, 0))
Building a multimodal model
Now that we have a sense of how we're going to need to process the data, we can start the model building process. There are three big-picture considerations to keep in mind as we develop the model,
- Dataset handling
- Model architecture
- Training logic
These sub-problems, while interrelated, are certainly each worthy of their own blog post (and many such posts exist). For our purposes, the first two are particularly impacted by the fact that our problem is multimodal. The third is an ever-present headache for machine learners and data scientist the world over. We will consider each in turn before witnessing their glorious union in the model training phase.
Creating a multimodal dataset
Our model will need to process appropriately transformed images and properly encoded text inputs separately. That means for each sample from our dataset, we'll need to be able to access "image" and "text" data independently. Lucky for us, the PyTorch Dataset class makes this pretty easy. If you haven't yet had the pleasure of working with this object, we highly reccomend the short tutorial.
All we're required to do to subclass a Dataset is
- Define its size by overriding
__len__ - Define how it returns a sample by overriding
__getitem__
We can use the Pandas DataFrame of json records as we did above with train_samples_frame to do both of these things and more. We can get the length of the dataset from the samples frame, use the img column to load the images, subsample our data for faster development using the Pandas sample method, and balance the training set by slicing the dataframe based on label—we can even use DrivenData's own pandas_path accessor to help validate the data!
We want the dataset to return data ready for model input, that means torch.tensors. So our __getitem__ method will need to prepare
- Images by applying
image_transform - Text by applying
text_transform
image_transform was introduced above, and text_transform will be the "sentence vector" created by our fastText model.
We'll return our samples as dictionaries with keys for
"id", the image id"image", the image tensor"text", the text tensor"label", the label it it exists
class HatefulMemesDataset(torch.utils.data.Dataset):
    """Uses jsonl data to preprocess and serve
    dictionary of multimodal tensors for model input.
    """

    def __init__(
        self,
        data_path,
        img_dir,
        image_transform,
        text_transform,
        balance=False,
        dev_limit=None,
        random_state=0,
    ):
        self.samples_frame = pd.read_json(data_path, lines=True)
        self.dev_limit = dev_limit
        if balance:
            neg = self.samples_frame[self.samples_frame.label.eq(0)]
            pos = self.samples_frame[self.samples_frame.label.eq(1)]
            self.samples_frame = pd.concat(
                [neg.sample(pos.shape[0], random_state=random_state), pos]
            )
        if self.dev_limit:
            if self.samples_frame.shape[0] > self.dev_limit:
                self.samples_frame = self.samples_frame.sample(
                    dev_limit, random_state=random_state
                )
        self.samples_frame = self.samples_frame.reset_index(drop=True)
        self.samples_frame.img = self.samples_frame.apply(
            lambda row: (img_dir / row.img), axis=1
        )

        # https://github.com/drivendataorg/pandas-path
        if not self.samples_frame.img.path.exists().all():
            raise FileNotFoundError
        if not self.samples_frame.img.path.is_file().all():
            raise TypeError

        self.image_transform = image_transform
        self.text_transform = text_transform

    def __len__(self):
        """This method is called when you do len(instance)
        for an instance of this class.
        """
        return len(self.samples_frame)

    def __getitem__(self, idx):
        """This method is called when you do instance[key]
        for an instance of this class.
        """
        if torch.is_tensor(idx):
            idx = idx.tolist()

        img_id = self.samples_frame.loc[idx, "id"]

        image = Image.open(self.samples_frame.loc[idx, "img"]).convert("RGB")
        image = self.image_transform(image)

        text = torch.Tensor(
            self.text_transform.get_sentence_vector(self.samples_frame.loc[idx, "text"])
        ).squeeze()

        if "label" in self.samples_frame.columns:
            label = torch.Tensor([self.samples_frame.loc[idx, "label"]]).long().squeeze()
            sample = {"id": img_id, "image": image, "text": text, "label": label}
        else:
            sample = {"id": img_id, "image": image, "text": text}

        return sample
Now that we have a way of processing and organizing the meme data, we'll be able to use the torch.utils.data.DataLoader to actually serve the data. More on that when we get to training.
Creating a multimodal model
Believe it or not, it will take less code to create the model than it did to define the dataset! If you're new to PyTorch, check out their guide to creating custom modules. We're going to implement a design called mid-level concat fusion.

In our LanguageAndVisionConcat architecture, we'll run our image data mode through an image model, taking the last set of feature representations as output, then the same for our languge mode. Then we'll concatenate these feature representations and treat them as a new feature vector, and send it through a final fully connected layer for classification.
We'll treat the language and vision modules as paramters of our mid-level fusion model. In other words, we won't edit their respective archtectures within the LanguageAndVisionConcat module, focusing instead on the "fusion" aspect of the process and any layers we want to add afterwards. Not only does this make it easy to swap out language and vision components, but it also means our LanguageAndVisionConcat module really just needs to define the concatenation operation and fully connected classification layer! Note that our call to forward, the model's "forward pass," expects both text and image input.
class LanguageAndVisionConcat(torch.nn.Module):
    def __init__(
        self,
        num_classes,
        loss_fn,
        language_module,
        vision_module,
        language_feature_dim,
        vision_feature_dim,
        fusion_output_size,
        dropout_p,
    ):
        super(LanguageAndVisionConcat, self).__init__()
        self.language_module = language_module
        self.vision_module = vision_module
        self.fusion = torch.nn.Linear(
            in_features=(language_feature_dim + vision_feature_dim),
            out_features=fusion_output_size,
        )
        self.fc = torch.nn.Linear(
            in_features=fusion_output_size, out_features=num_classes
        )
        self.loss_fn = loss_fn
        self.dropout = torch.nn.Dropout(dropout_p)

    def forward(self, text, image, label=None):
        text_features = torch.nn.functional.relu(self.language_module(text))
        image_features = torch.nn.functional.relu(self.vision_module(image))
        combined = torch.cat([text_features, image_features], dim=1)
        fused = self.dropout(torch.nn.functional.relu(self.fusion(combined)))
        logits = self.fc(fused)
        pred = torch.nn.functional.softmax(logits)
        loss = self.loss_fn(pred, label) if label is not None else label
        return (pred, loss)
We could develop much more sophisticated apporaches for "fusing" our data modes. For example, feature representations could become coupled in the middle of the component modules rather than at the top, and of course each module itself can be changed. There's definiltey lots of fun to be had in this direction, but that journey is yours. Today we're just trying to get a baseline submission.
Training a multimodal model
We'll be using PyTorch Lightning to train our model without writing any for loops! This wonderful library takes care of a lot of boilerplate training code and allows us to focus on the fun part, the modeling work we've already done.
While the code below may look like a lot, each method is short and simple. By subclassing the PyTorch Lightning LightningModule, we get most of the training logic "for free" behind the scenes. We just have to define what a forward call and training_step are, and provide our model with a train_dataloader. Behavior such as checkpoint saving and early stopping can be parameterized, but need not be fully implemented because Lightning handles the details. We can also add any additional methods we want, e.g., make_submission_frame for preparing our competition submission csv. If you're new to PyTorch Lightning, you may fine their quick start guide usefule.
We're going to implement a LightningModule subclass called HatefulMemesModel which takes a Python dict of hyperparameters called hparams that are used to customize the instantiation. This pattern is a Lightning convention that allows us to easily load trained models for future use, as we'll see when we generate a submission to the competition.
For the language and vision module definitions, see the _build_model method. The language module is going to use fasttext embeddings as input, computed as the text_transform in our data generator (we'll keep the embeddings fixed for simplicity, although they are fit to our training data). The outputs of the language module will come from a trainable Linear layer, as a way of fine-tuning the embedding representation during training. The vision module inputs will be normalized images, computed as the image_transform in our data generator, and the outputs will be the outputs of a ResNet model.
Note: We'll also add defaults for almost all of the hparams referenced in our HatefulMemesModel. This will make it easier to focus on the changes you want to make while experimenting rather than needing to include a bunch a defaults. These could be included as defaults, but Lightning is easiest to use when we keep them factored into hparams. This is reasonable, since everything specified by hparams is independend of the actual modeling architecutre we defined above.
Buckle up, this is a long one (but no for-loops)!
import pytorch_lightning as pl


# for the purposes of this post, we'll filter
# much of the lovely logging info from our LightningModule
warnings.filterwarnings("ignore")
logging.getLogger().setLevel(logging.WARNING)


class HatefulMemesModel(pl.LightningModule):
    def __init__(self, hparams):
        for data_key in [
            "train_path",
            "dev_path",
            "img_dir",
        ]:
            # ok, there's one for-loop but it doesn't count
            if data_key not in hparams.keys():
                raise KeyError(f"{data_key} is a required hparam in this model")

        super(HatefulMemesModel, self).__init__()
        self.hparams = hparams

        # assign some hparams that get used in multiple places
        self.embedding_dim = self.hparams.get("embedding_dim", 300)
        self.language_feature_dim = self.hparams.get("language_feature_dim", 300)
        self.vision_feature_dim = self.hparams.get(
            # balance language and vision features by default
            "vision_feature_dim",
            self.language_feature_dim,
        )
        self.output_path = Path(self.hparams.get("output_path", "model-outputs"))
        self.output_path.mkdir(exist_ok=True)

        # instantiate transforms, datasets
        self.text_transform = self._build_text_transform()
        self.image_transform = self._build_image_transform()
        self.train_dataset = self._build_dataset("train_path")
        self.dev_dataset = self._build_dataset("dev_path")

        # set up model and training
        self.model = self._build_model()
        self.trainer_params = self._get_trainer_params()

    ## Required LightningModule Methods (when validating) ##

    def forward(self, text, image, label=None):
        return self.model(text, image, label)

    def training_step(self, batch, batch_nb):
        preds, loss = self.forward(
            text=batch["text"], image=batch["image"], label=batch["label"]
        )

        return {"loss": loss}

    def validation_step(self, batch, batch_nb):
        preds, loss = self.eval().forward(
            text=batch["text"], image=batch["image"], label=batch["label"]
        )

        return {"batch_val_loss": loss}

    def validation_epoch_end(self, outputs):
        avg_loss = torch.stack(
            tuple(output["batch_val_loss"] for output in outputs)
        ).mean()

        return {"val_loss": avg_loss, "progress_bar": {"avg_val_loss": avg_loss}}

    def configure_optimizers(self):
        optimizers = [
            torch.optim.AdamW(self.model.parameters(), lr=self.hparams.get("lr", 0.001))
        ]
        schedulers = [torch.optim.lr_scheduler.ReduceLROnPlateau(optimizers[0])]
        return optimizers, schedulers

    @pl.data_loader
    def train_dataloader(self):
        return torch.utils.data.DataLoader(
            self.train_dataset,
            shuffle=True,
            batch_size=self.hparams.get("batch_size", 4),
            num_workers=self.hparams.get("num_workers", 16),
        )

    @pl.data_loader
    def val_dataloader(self):
        return torch.utils.data.DataLoader(
            self.dev_dataset,
            shuffle=False,
            batch_size=self.hparams.get("batch_size", 4),
            num_workers=self.hparams.get("num_workers", 16),
        )

    ## Convenience Methods ##

    def fit(self):
        self._set_seed(self.hparams.get("random_state", 42))
        self.trainer = pl.Trainer(**self.trainer_params)
        self.trainer.fit(self)

    def _set_seed(self, seed):
        random.seed(seed)
        np.random.seed(seed)
        torch.manual_seed(seed)
        if torch.cuda.is_available():
            torch.cuda.manual_seed_all(seed)

    def _build_text_transform(self):
        with tempfile.NamedTemporaryFile() as ft_training_data:
            ft_path = Path(ft_training_data.name)
            with ft_path.open("w") as ft:
                training_data = [
                    json.loads(line)["text"] + "/n"
                    for line in open(self.hparams.get("train_path")).read().splitlines()
                ]
                for line in training_data:
                    ft.write(line + "\n")
                language_transform = fasttext.train_unsupervised(
                    str(ft_path),
                    model=self.hparams.get("fasttext_model", "cbow"),
                    dim=self.embedding_dim,
                )
        return language_transform

    def _build_image_transform(self):
        image_dim = self.hparams.get("image_dim", 224)
        image_transform = torchvision.transforms.Compose(
            [
                torchvision.transforms.Resize(size=(image_dim, image_dim)),
                torchvision.transforms.ToTensor(),
                # all torchvision models expect the same
                # normalization mean and std
                # https://pytorch.org/docs/stable/torchvision/models.html
                torchvision.transforms.Normalize(
                    mean=(0.485, 0.456, 0.406), std=(0.229, 0.224, 0.225)
                ),
            ]
        )
        return image_transform

    def _build_dataset(self, dataset_key):
        return HatefulMemesDataset(
            data_path=self.hparams.get(dataset_key, dataset_key),
            img_dir=self.hparams.get("img_dir"),
            image_transform=self.image_transform,
            text_transform=self.text_transform,
            # limit training samples only
            dev_limit=(
                self.hparams.get("dev_limit", None)
                if "train" in str(dataset_key)
                else None
            ),
            balance=True if "train" in str(dataset_key) else False,
        )

    def _build_model(self):
        # we're going to pass the outputs of our text
        # transform through an additional trainable layer
        # rather than fine-tuning the transform
        language_module = torch.nn.Linear(
            in_features=self.embedding_dim, out_features=self.language_feature_dim
        )

        # easiest way to get features rather than
        # classification is to overwrite last layer
        # with an identity transformation, we'll reduce
        # dimension using a Linear layer, resnet is 2048 out
        vision_module = torchvision.models.resnet152(pretrained=True)
        vision_module.fc = torch.nn.Linear(
            in_features=2048, out_features=self.vision_feature_dim
        )

        return LanguageAndVisionConcat(
            num_classes=self.hparams.get("num_classes", 2),
            loss_fn=torch.nn.CrossEntropyLoss(),
            language_module=language_module,
            vision_module=vision_module,
            language_feature_dim=self.language_feature_dim,
            vision_feature_dim=self.vision_feature_dim,
            fusion_output_size=self.hparams.get("fusion_output_size", 512),
            dropout_p=self.hparams.get("dropout_p", 0.1),
        )

    def _get_trainer_params(self):
        checkpoint_callback = pl.callbacks.ModelCheckpoint(
            filepath=self.output_path,
            monitor=self.hparams.get("checkpoint_monitor", "avg_val_loss"),
            mode=self.hparams.get("checkpoint_monitor_mode", "min"),
            verbose=self.hparams.get("verbose", True),
        )

        early_stop_callback = pl.callbacks.EarlyStopping(
            monitor=self.hparams.get("early_stop_monitor", "avg_val_loss"),
            min_delta=self.hparams.get("early_stop_min_delta", 0.001),
            patience=self.hparams.get("early_stop_patience", 3),
            verbose=self.hparams.get("verbose", True),
        )

        trainer_params = {
            "checkpoint_callback": checkpoint_callback,
            "early_stop_callback": early_stop_callback,
            "default_save_path": self.output_path,
            "accumulate_grad_batches": self.hparams.get("accumulate_grad_batches", 1),
            "gpus": self.hparams.get("n_gpu", 1),
            "max_epochs": self.hparams.get("max_epochs", 100),
            "gradient_clip_val": self.hparams.get("gradient_clip_value", 1),
        }
        return trainer_params

    @torch.no_grad()
    def make_submission_frame(self, test_path):
        test_dataset = self._build_dataset(test_path)
        submission_frame = pd.DataFrame(
            index=test_dataset.samples_frame.id, columns=["proba", "label"]
        )
        test_dataloader = torch.utils.data.DataLoader(
            test_dataset,
            shuffle=False,
            batch_size=self.hparams.get("batch_size", 4),
            num_workers=self.hparams.get("num_workers", 16),
        )
        for batch in tqdm(test_dataloader, total=len(test_dataloader)):
            preds, _ = self.model.eval().to("cpu")(batch["text"], batch["image"])
            submission_frame.loc[batch["id"], "proba"] = preds[:, 1]
            submission_frame.loc[batch["id"], "label"] = preds.argmax(dim=1)
        submission_frame.proba = submission_frame.proba.astype(float)
        submission_frame.label = submission_frame.label.astype(int)
        return submission_frame
Ok, that was a lot! Before we proceed with training though let's recap what we've done. We've separated our data processing, modeling, and training logic
- Data processing code is contained inside of
HatefulMemesDataset, which subclasses PyTorchDataset - Multimodal fusion model code is contained inside of
LanguageAndVisionConcat, which subclasses PyTorchtorch.nn.Module - Training, early stopping, checkpoint saving, and submission building code is contained inside of
HatefulMemesModel, which subclasses the PyTorch Lightningpl.LightningModule
A HatefulMemesModel can be instantiated using only a dict of hparams. There are only a few required hparams—the paths which point to our .jsonl files as well as the image directory. Our __init__ will tell us if we've forgotten those. Beyond that, there are many hyperparameters we could specifiy in order to experiment with different models and early stopping strategies, batch sizes, learning rates, ..., but thanks to the handy .get method on Python dictionaries, our code won't fail us if we fail to specify these parameters.
Fit the model
We've put in a lot of hard work, but this part is easy. We'll specify the required hparams and a few of the optional ones, then sit back and watch the magic happen.
hparams = {
    # Required hparams
    "train_path": train_path,
    "dev_path": dev_path,
    "img_dir": data_dir,
    # Optional hparams
    "embedding_dim": 150,
    "language_feature_dim": 300,
    "vision_feature_dim": 300,
    "fusion_output_size": 256,
    "output_path": "model-outputs",
    "dev_limit": None,
    "lr": 0.00005,
    "max_epochs": 10,
    "n_gpu": 1,
    "batch_size": 4,
    # allows us to "simulate" having larger batches
    "accumulate_grad_batches": 16,
    "early_stop_patience": 3,
}

hateful_memes_model = HatefulMemesModel(hparams=hparams)
hateful_memes_model.fit()

Making a submission
How pleasant was that? Training deep learning models is expensive and time-consuming, so it's particularly nice that PyTorch Lightning makes it so easy to save and load the fruits of our labor when it comes time to perform inference.
Let's load our best performing model and make a submission.
# we should only have saved the best checkpoint
checkpoints = list(Path("model-outputs").glob("*.ckpt"))
assert len(checkpoints) == 1

checkpoints
hateful_memes_model = HatefulMemesModel.load_from_checkpoint(checkpoints[0])
submission = hateful_memes_model.make_submission_frame(test_path)
submission.head()
The head looks good. Since this is a first pass, let's check a couple of things.
submission.groupby("label").proba.mean()
It seems like our model is is starting to separate classes.
submission.label.value_counts()
Let's save and submit our submissions and see what AUC ROC score we got!
submission.to_csv(("model-outputs/submission.csv"), index=True)
Next, we head to the competition submissions page and upload our submission!

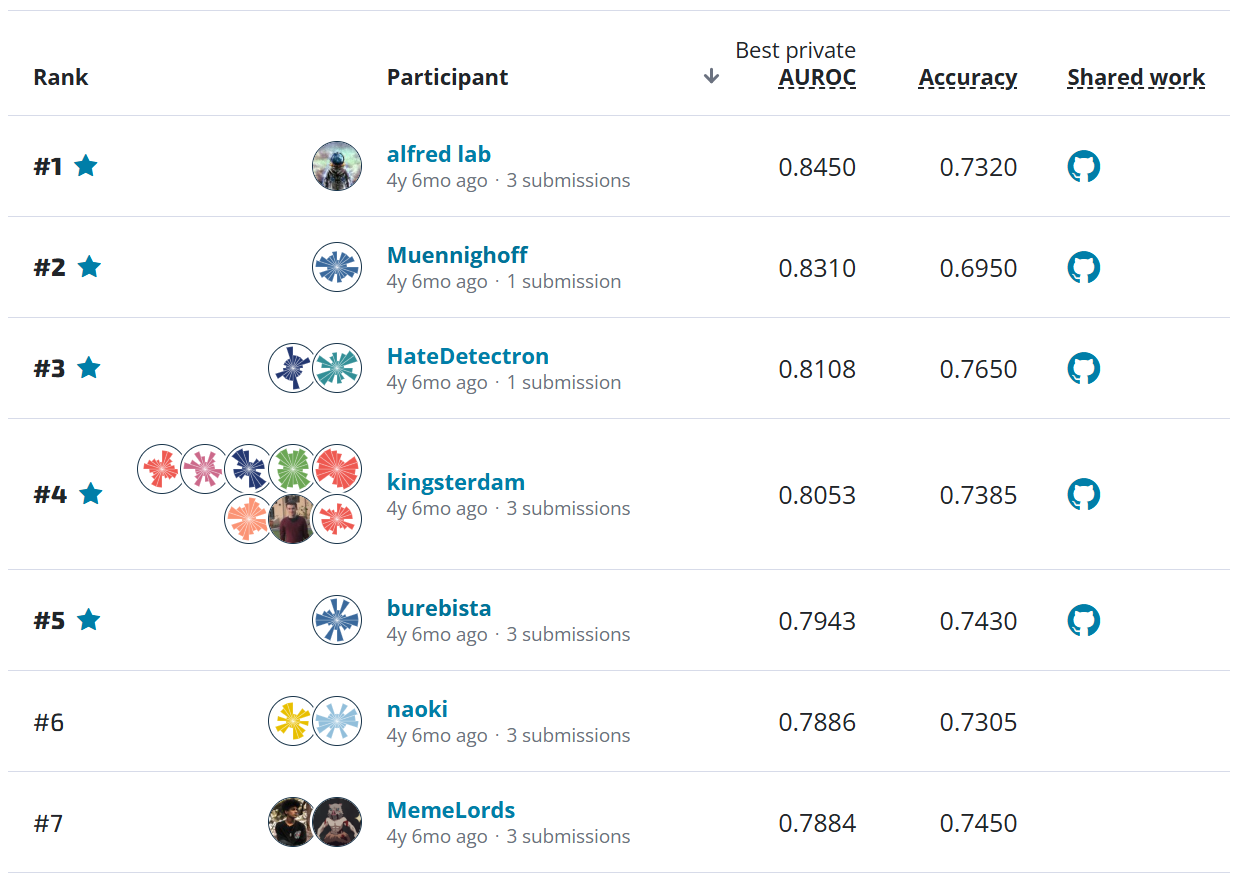
We'll also see an accuracy score of 0.5340 on the leaderboard.
That shouldn't be too hard to beat! At least we're overfitting, which is a start. There is plenty to change to improve this score, but we'll leave that up to you. We hope this benchmark provides some reasonable guidelines for how you can get all of components hooked up when trying to design, build, and train your own multimodal deep learning model to detect hateful memes.
Head on over to the Hateful Memes challenge homepage to get started. We can't wait to see what you come up with!


